Showing posts with label project. Show all posts

8.23.2010

Don't fall...

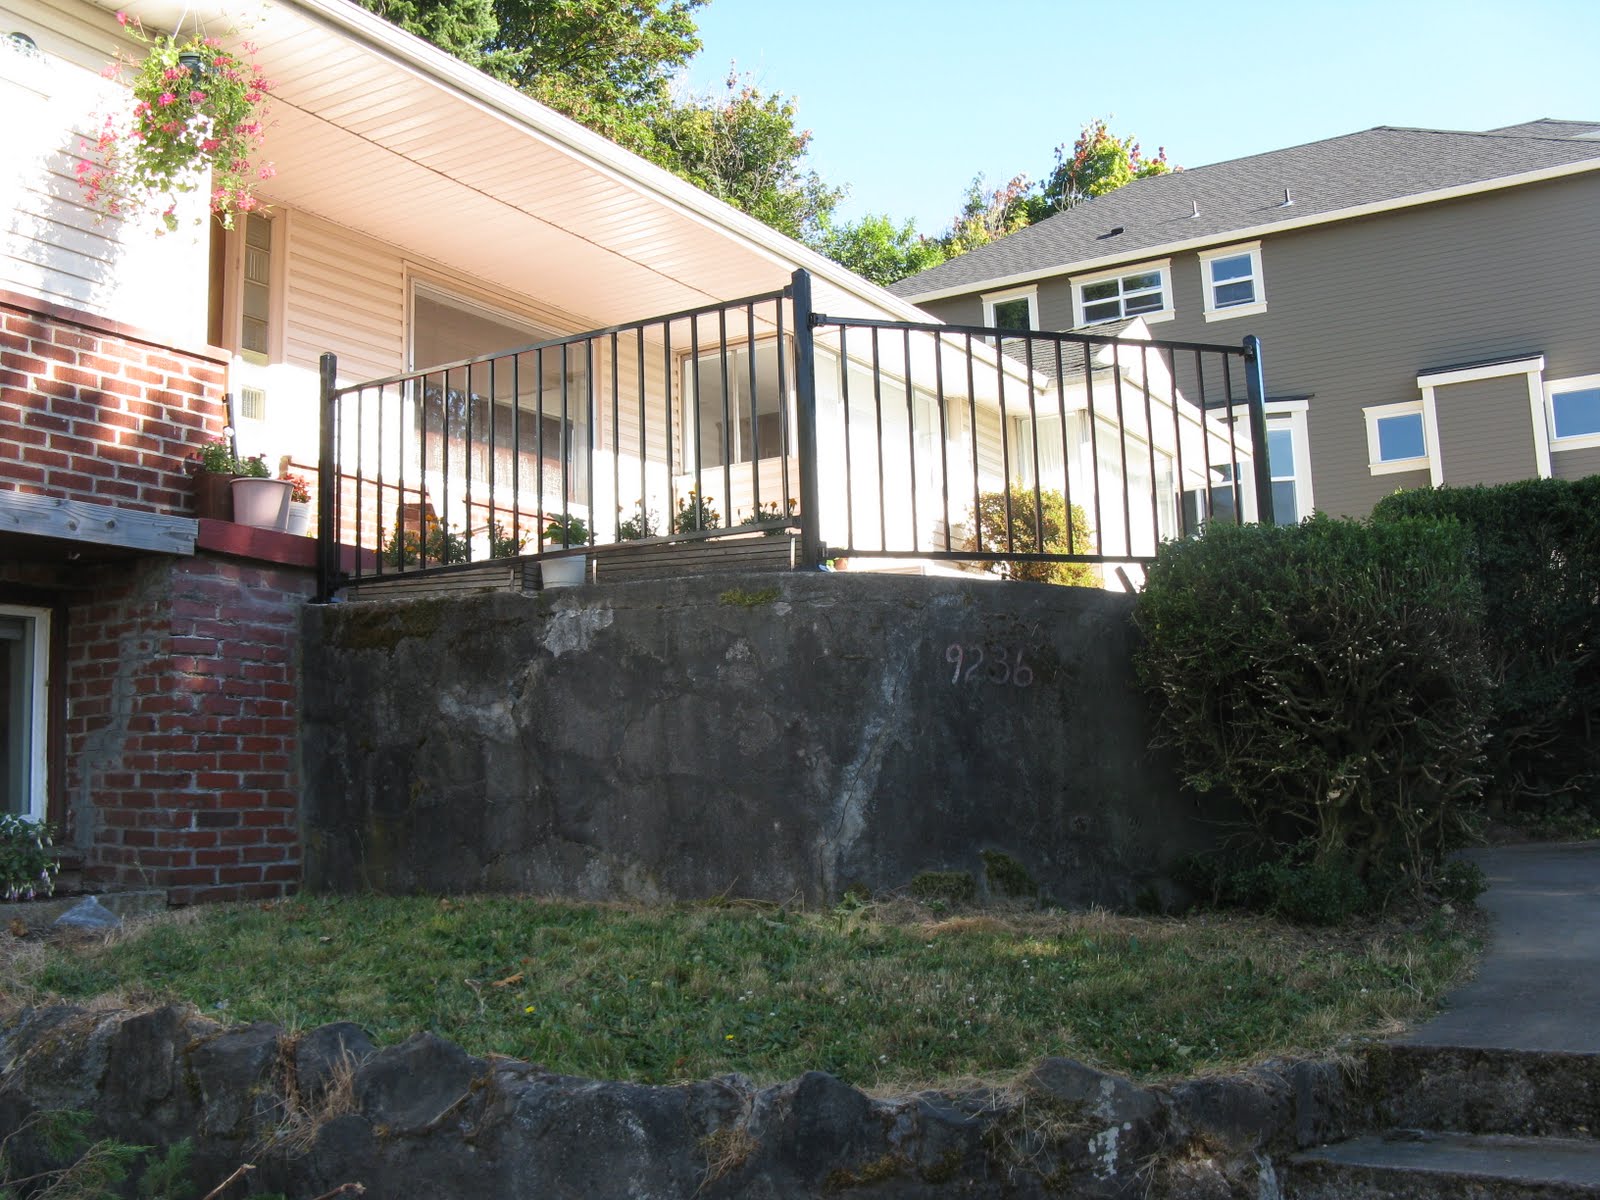
...off our porch!  I say porch, I mean cement walk way thing that leads to our front door.  If you haven't noticed, our front yard has levels - three to be exact.  To make our insurance company very happy, we decided it was time to install a fence they had asked us to do...oh...11 months ago.

We knew we wanted to use wrought iron, since we felt that it would go the best with our house as it was built in 1948.  The problem is that wrought iron, especially custom made fencing is expensive. Like, seriously.  I called one local company and they would charge almost $2,000 to do what we did below for about $300.  Crazy.  (Granted, custom always looks better...)

So, we found a place that sold wrought iron fencing and, um, creatively made it work with our totally wonky, crooked cement area we do not want small children, elderly, or people sneaking around our house in the middle of the night falling off of (well, that last group might deserve to fall off, I guess).

{We now call our house "the fortress".}


One of the funnest things poor Mark had to deal with was the fact that whole cement area is sloped. There was a difference of 9" from the post nearest the door to the post nearest the stairs. That's a lot. Especially when the fencing you just purchased doesn't account in any way for a slope.  For about an hour we were wishing we'd forked over two grand, but then we used our brains and figured out how it would work and look ... okay. We're pleased with it.  And it will prevent you all from going over!

7.01.2010

The List

I made a list of everything we still have to do. I broke it down by room.  See?  There is a light!  The strike-throughed stuff is what we accomplished since I created the list Saturday morning...

Dining Room
Trim
Caulk and paint trim
Paint walls and ceiling

Hallway
Trim
Caulk and paint trim
Paint walls and ceiling

Little Room
Remove heat register
Redo window trim
Base trim
Caulk and paint trim

Master Bedroom
Carpet to wood transition piece
Redo window trim
Install closet door knobs
Base trim
Caulk and paint trim

Master Bathroom
Seal tub grout
Redo window trim
Caulk sinks
Cabinet moulding
Base trim
Caulk and paint trim
Paint walls and ceiling
Glue mirrors to wall
Cabinet hardware

Hallway Bathroom
Find vanity tile grout color
Grout vanity
Sink plumbing
Seal floor, counter, backsplash
Hang mirror
Cabinet trim
Base trim
Caulk and paint trim
Re-caulk shower
Install toilet (and get low flow conversion kit)
Cabinet hardware

Kitchen
Grout backsplash
Seal floor and backsplash
Cabinet moulding
Caulk and paint moulding
Long screws - upper cabinets
Cabinet shelves
Cabinet hardware
Bleach window and paint trim

All Around
Paint all new doors
Touch up paint everywhere

See? Hardly anything left!!
I'll do weekly updates of this list to show what we accomplish each week...wish us luck!!

6.08.2010

Kitchen Adventures

I know the 5 of you who read this blog are chomping at the bit, ready for me to reveal my brand spankin' new kitchen! I hate to disappoint you, but it's not done yet.  We've been working hard on it, but we've run into a few...adventures.

Adventure #1 - We shattered a 3'x9' granite slab. Yep, 250 bucks down the drain. As I always say, "What doesn't kill us makes us more broke."  We bought another piece and moved on.

Adventure #2 - Remember the great deal on door/window trim (casing) that we got? Yeah. It wasn't the same stuff.  Unfortunately, Mark didn't notice until he had already installed it on some of our doorways.  The one we picked was very square...this one has soft edges. Needless to say, it's the one we're sticking with!

Adventure #3 - Mark thought it would be a good idea for ME to lay the tile in our kitchen (while he made all the necessary cuts).  I'm a perfectionist and our 62 year old floor is not. Mark had to intervene a few times, but we're all still alive.

So, as you can see, remodeling doesn't always go the way you want it to.  You learn that you have to be a little bit flexible and have a lot of patience (throw in some good spousal communication and you've got it made!).

To hold you over until the big reveal, here are a few sneak peaks.


I leave for Washington DC on Saturday and get back the following Friday night. I'm hoping to be able to use my kitchen when I get back!

5.26.2010

Guess what's different

Obviously we have loads more work to do before our kitchen is "finished", but Mark added a few more touches today that makes this room feel a little more "done".

Notice anything different?


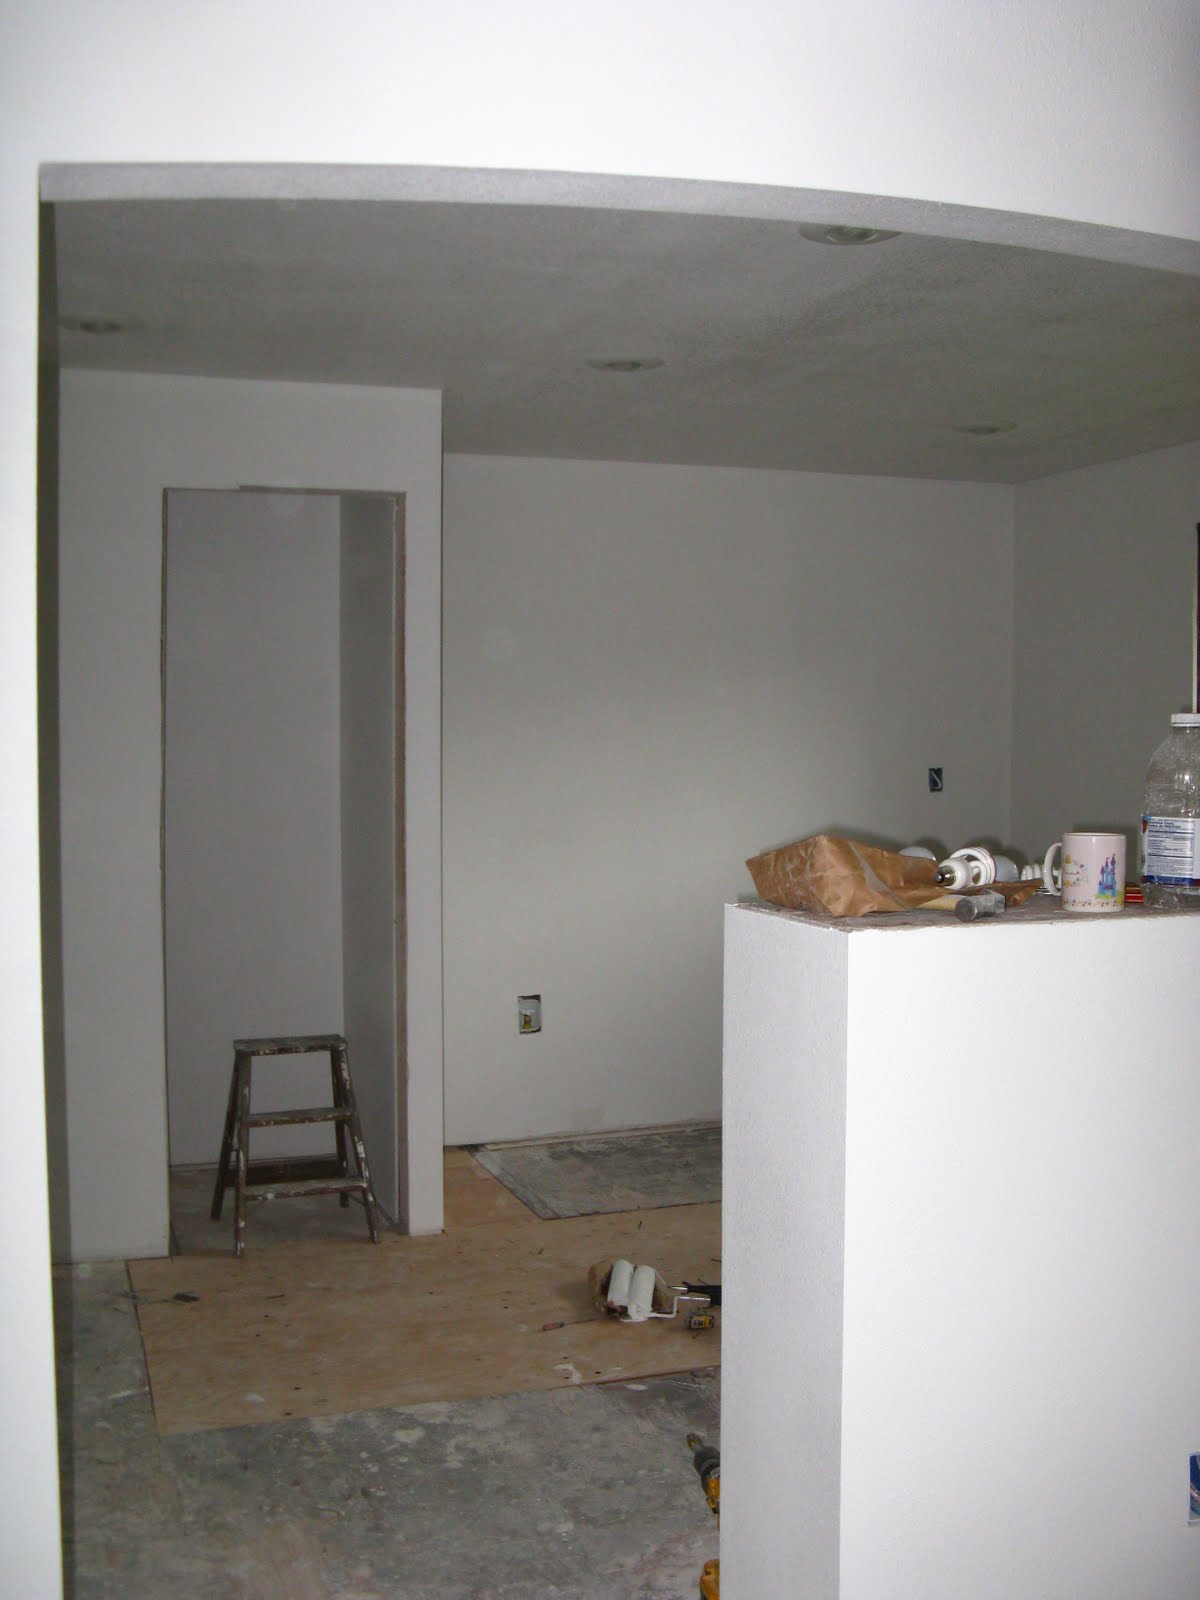
1. Crown moulding, check!
2. Plywood decking, check!
3. Wood panels on end cabinets, check!
4. He even went to Lowes today and bought all the cabinet hardware (pulls) as you can see in the picture above. They're not installed yet...that will be a real finishing touch...but they are stainless steel and look like this (image from here):
Mark does not waste time - I just heard a "pow!" and a "holla!" come from the kitchen area...he's laying Hardibacker on the kitchen floor in preparation for our stone/tile floors which, no, we have not picked out yet.  He also just finished the wiring for the double wall oven and microwave. Everything just gets us closer and closer to a real, working kitchen!!

And now for a story ... We (that was the imperial we - meaning Mark) had a major score at Big Orange, otherwise knows as The Home Store That Is Taking 90% of My Paycheck yesterday...he went in and talked to the special order people about our moulding situation (door and window casing).  The style we like only came in Hemlock and it was going to be a pain to prime and paint, so he asked if it came in the already primed MDF.  They looked and found that they do have it - but only by special order.  Wondering how much it was, he asked and while the sales person was making the call, he did some math and figured it would be near the price of the Hemlock which was a little over a dollar a linear foot.  The sales person got off the phone and said to Mark, "It'll be .28 cents a linear foot."  And he said, "Give me one million feet of it!"  Kidding...but he did get more than he needed.  I have no idea how it was that price, but that was a God deal (good deal), for sure! (Makes me think of our double wall oven.)  :o)

5.25.2010

Pictures speak louder than words.

{When I got home from work, I saw this.}

{Which color is more accurate? You'll have to come see for yourself!}


{A few more...}

{And a few more...}

{And, finally the 360 degree tour...}


Someone sure did a lot of work on his 27th birthday!!  What a guy!!

5.16.2010

Weekend Update with The Holmes'

I know.  Not as cool as "with Norm MacDonald", but what can I do?

Yesterday, we accomplished a LOT. (Mind you, we spent from 8am to 1pm driving from Georgies to Lowes to Home Depot...so we didn't get started until afternoon!)

...Prime and Paint? Check!


...Lay plywood sub floor in the kitchen? Check!


...Bisque fire? Check!
{This is top secret...so sorry, no pictures.}

...Go to Georgies and get some clay supplies? Check!
{Again, top secret. Sorry!}

So, 4 things on the list are checked off, but we also did a lot of stuff NOT on the list. Like...

...Purchased and installed both bathroom vanity lights.
...Install all kitchen flood lights.
...Cleaned up all tools and remodeling junk from our upstairs so that I can actually start cleaning the dust from this place!!
...Installed the new circuit board on our double wall oven - and it works!
...Bought wood for the pantry shelves.
...Roughly 25 loads of laundry. At least that's what it felt like.

Here's hoping that we have another productive day!!

5.14.2010

Plan for the weekend

This weekend is supposed to be nice and sunny and in the 70s, but we have another packed weekend of working on the house.  Here's my "what I hope to accomplish" list:

  1. Prime and paint the kitchen and hallway (white for now).
  2. Pick out hallway bathroom flooring/counter tile or stone (no, we still haven't decided this yet).
  3. Hang pantry door in kitchen. 
  4. Finish top of pony wall separating kitchen and dining room.
  5. Lay some plywood sub floor in the kitchen.
  6. ?? I'm sure that I'm forgetting something...
Other things:
  1. Bisque fire
  2. Go to Georgies and get some clay supplies.
  3. Go to LO's farmer's market - opening day tomorrow!!
  4. Grocery shopping
  5. Church
  6. ?? I'm sure that I'm forgetting something...like maybe having fun?
Until next week, here's a picture from Country Home:


Those are incredibly similar to our doors!  I can't wait to have a pantry I can fill up with food!!  I'm missing having a kitchen...

4.30.2010

I love frosting!

I don't mean the stuff you put on cakes, though I love that too!  I'm talking about window frosting, as in the stuff that peeping toms hate.  Light comes in, but you can't see anything!  That's what we decided to put on our big corner window in the bathroom to prevent people (like our little construction buddies next door who are building that big, beautiful house) from sneaking a peek.

The window film stuff is pretty easy to put on.  It's basically 5 steps:

  1. Clean your window. The cleanest it's ever been. Seriously. Anything left on your window will show, so make sure they are "Terri Goss" clean. (I love you, mommy!)
  2. Cut your window film to size.
  3. Spray your super clean window with soapy water (few drops of dish detergent in a spray bottle filled with cold water).  The more soapy water you spray on, the easier time you'll have getting the window film on, though don't use half your spray bottle.
  4. Peel off the backing of the film and stick it on the window.
  5. Once on, squeegee all the air bubbles out (this step takes the longest, probably a whole 4 to 5 minutes).
Window pane number one:


See the bottom left corner? All nice and frosted!

Now with three panes frosted...bottom right the only one not frosted at this point.


Another view...(crazy lighting and flash turned it yellow!)


And, the last one...


Done!  

Easy, cheaper than buying new windows and completely moisture safe.  Now, we'll have to pretty that window up, remove the old curtain hardware and it'll be good as new!  Also, you can clean the frosted windows like any other window - with Windex or your favorite window cleaning agent.  


One flannel sheet window hanging down, 3 more to go!

Hallway Bathroom & Little Bedroom...

...have been completely destroyed!!


Sheetrock has been torn out...bathroom totally gutted...


The shower tub has been relocated to it's new position at the back of the bathroom...woo hoo for no more one person, awkward layout bathroom! (Besides the fact it's - at the moment - completely unusable!)


Living in a constant state of dust and destruction is fun...


I lie. It's hard, but in the end I think it will be worth it. (Cliff, on the other hand, isn't so sure...)

4.21.2010

Bath tub surround & toilet

The weekend wasn't AS productive as I was planning it to be. Mark worked on the tub and toilet a bit on Saturday (#1 from my last post); #2 and #3 didn't happen. At all. But, Mark has not had to work a lot this week, so he's been able to devote some time to our home projects.

Mark's been busy for about 2 days working on the master bath surround and we are now done...with the tiling...of the surround...only. So, yeah. We have more work to do, obviously. But this is a big step! We also installed our new toilet! (I see "we", but really, it's been all Mark.)

Mark brought me home this beauty on our anniversary (the Cliff was not included). No, this wasn't my present, but I was sure excited about it! It's a dual-flush toilet which uses much less water than traditional toilets and it was super reasonable because he got it from the distributor he uses for work.

{He fits perfectly inside it...and didn't want to leave.}


It's installed and is our only working toilet now!  It's great!  I would definitely recommend a dual-flush toilet to anyone looking to save water and save money.

Now for the tub surround...
It started out looking like this...


With just a little work, it became this...


Mark got the top tiled, the tub set in, plumbing all hooked up and our new faucet installed.  Looks pretty good, eh?! Especially with the very classy flannel sheet hanging in the window. Now that's what I call fancy!

Then, today when I got home from work, I discovered this...


{The black things poking out are screws...I think Mark is using them as spacers.}


{And here's a super close up.}

Mark has to let this set for a few days and then we'll grout it.  

About grouting...we went round and round trying to decide - sanded grout or non-sanded grout. Usually with smaller than 1/8" grout lines you use non-sanded grout, and with lines bigger than 1/8" you use sanded...but we've got a combination of grout line sizes. The grout lines aren't exactly equal because these tiles come on a 12"x12" mesh sheet. Mark decided to go with sanded grout.  We'll let you know how it turns out!

Tomorrow, we plan to take that flannel sheet window hanging down (sad, I know) and install our window frosting! Speaking of frosting your windows for privacy, check out these awesome options shown on decor8 - beautiful! Ours are just plain. Too bad, but it'll do the job.
4.15.2010

Big plans for the weekend

I have a lot planned to accomplish this weekend...but in just a short amount of time.  I have a busy weekend ahead of me (Mark isn't as busy, lucky) but I still have high hopes that we can get something accomplished. From working a lot to the two of us being sick, not a lot has happened on the old remodeling front.  Here's my to-do list:

1 - Begin laying marble tile on the tub surround. We start with the "deck" which is the top. Once that's done, Mark can get the tub all situated correctly and cut the holes for the plumbing.  Once plumbing is in, he'll install the tub and work on the face of the tub surround.

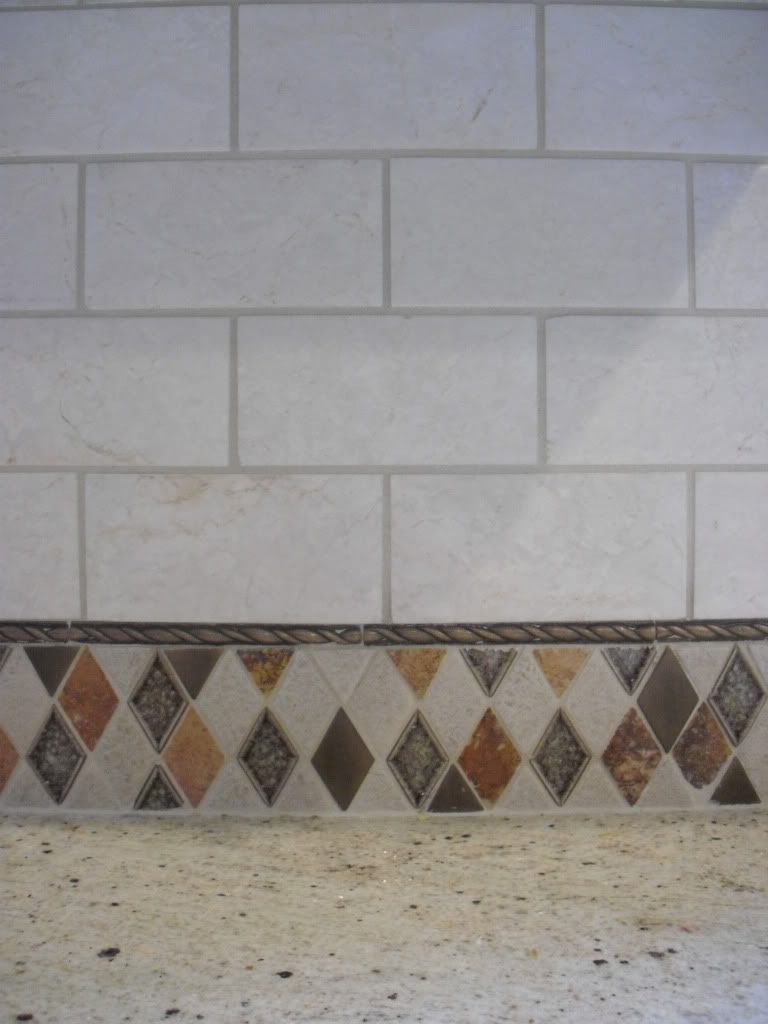
The stone we picked is Botticino Marble and we got it in 2x4 subway tiles, which looks very similar to this picture...a very ivory color stone with a slight grey and/or beige undertone.  I wanted something that looked similar in color to our carpet, and this stuff is great!!

Click here to see the picture

2 - "Frost" our bathroom windows. I didn't really want curtains of other window coverings in our bathroom because we would pretty much always want them closed since the windows are big, there will be so much steam from the soaker tub which could mold or just make things icky, etc...so we decided to buy a frosted window film.  Never used this before. No idea how it will look, but John and Sherry from Young House Love used similar stuff in their basement remodel. I figured we could give it a try. Plus, I love how light still shines though the film. I really want a hanging plant or two near the windows, so that will work out great!

3 - Sand more of my dresser. No idea if I will get to this or not, but I am really anxious to finish refinishing my dresser.  So far, I have stripped all the paint, done rough sand, and now am going back over with a fine sanding pad using my really awesome birthday present from my hubby...
{Image courtesy of Power Tools UK}

For those of you wondering, I actually ASKED for this for my birthday. Keep your comments to yourself.  (Kidding!) Once I'm done sanding, I am going to slap on some wood conditioner, stain it, and then probably do a coat or two of semi-gloss polyurethane to protect it. I really, really, really want it to be done so I can use it. 

It's not a long list, but like I said, I have no idea how much of it we will even accomplish.  Wish us luck!

4.11.2010

Little accomplishments...

I hate being too busy to work on house projects!  It seems like we've been stalled for a long time, and I feel like we need to break that cycle. Well, today we bought the material we need to tile the tub surround!  Mark is picking it up on Monday, so VERY SOON we'll have more things to post.

For now, I'll show you the little things we've been working on or accomplished recently...


The window seat/storage bench in our bedroom is practically done.  I still need to make a pad, sew cases for the large lumbar-type pillows, and shorten the curtains.  I want to find a cute pattern material to make more throw pillows...eventually my bed linens will match the grey/white/ivory-sand color pallet and half the pillows from the window seat will be on the bed.  Also, once we replace the windows, I want to add wood roller blinds because this window lets in a TON of light.  Like I say, it never ends...


Today, I had a little fun painting this old metal kitchen cart.  It's got a dent on the top I tried to hammer out...it's not perfect but that's okay.  I just have to find the perfect place for it...maybe my master bath to hold towels, tp, and a cutie little basket holding soap, etc?  Who knows, but it was a fun, fast $5 project.

And for the next big project...preparing to install the bathtub...


Have I mentioned that this is a 6' tub?!  It's HUGE! Mark and a friend of his built the tub surround last Saturday. Mark plans to do the plumbing for the tub and toilet at the same time, so we will soon be getting a toilet.  We want to get a dual-flush toilet - we're all about saving water and $$.  But, first thing's first - tiling the tub surround! We haven't decided 100% on the backsplash...but we have a couple options we're looking at.

Hopefully soon, I'll have more to share!